Click here to get this post in PDF
The remote working strategy had triggered the use of Microsoft Team Meetings to ensure flawless project processing. The recent pandemic attack had led to the demand for this virtual communication tool globally. You would have come across surplus remote meeting programs in the digital space, the Microsoft Team is one such application. The giant software developer company has introduced this online remote communication program to engage the business leaders to carry out their activities consistently despite distances. While working in a remote format, effective communication adds value to the business activities. It serves as a connecting bridge between the employees and employers. Using this innovative program helps the team leads to monitor the project status and their progress in detail. In this article, you will learn how to use this app efficiently to ensure productivity and boost profits.

How to screen record Microsoft Teams meeting
In this section, you will study how to record teams meeting using the Microsoft Team meeting app and a third-party tool EaseUS RecExperts.
Record with Microsoft Teams built-in recording feature
Step 1: Go to the official website of the Microsoft Team and download this app into your system. Install it and launch the app.
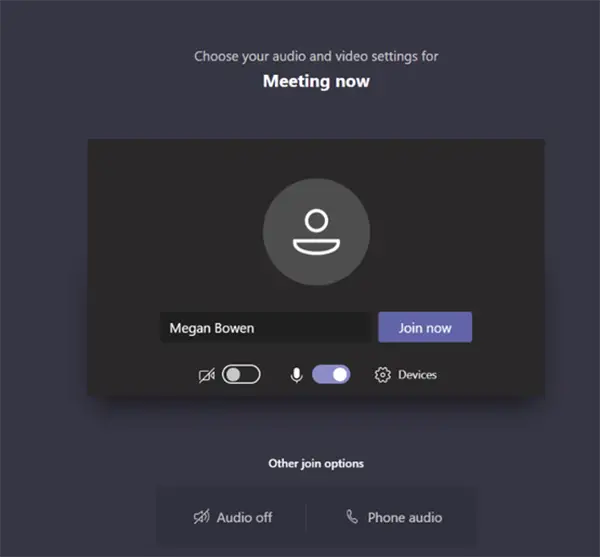
Step 2: On the home screen, you can either start a meeting or join an ongoing meeting using the link or code.
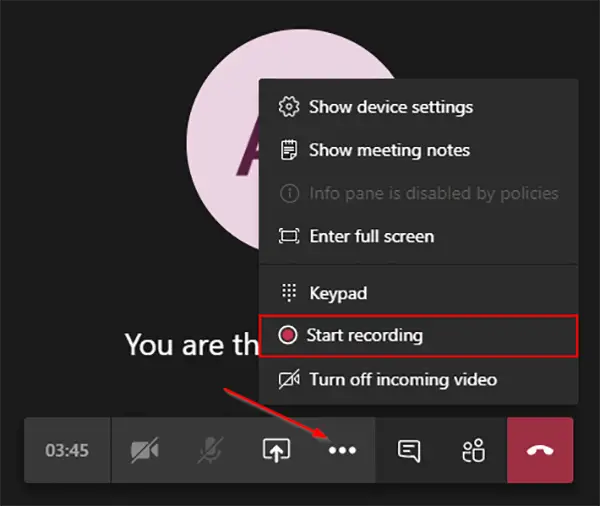
Step 3: While the meeting is in progress, you can tap the three horizontal dots available at the bottom middle of the screen and choose the ‘Start recording’ option from the pop-up lists.
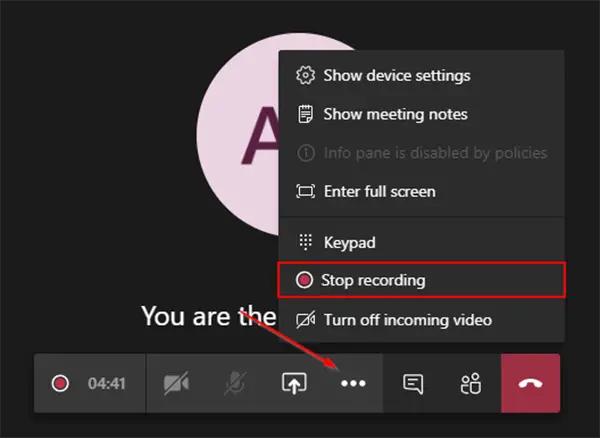
Step 4: The recording commences soon after the above step. If you want to stop the recording, you can hit the same icon and select the ‘Stop recording’ option.
The meeting is successfully recorded in your system for future reference. You can witness them whenever required without any issues.
The above procedure has considerable shortcomings as discussed below.
- The recording action is notified to the members available in the meeting.
- It is impossible to record the same meeting multiple times.
Whenever you tap the start recording button in the Microsoft Team meeting tool, all the members in the meeting receives a message about your recording action. It is difficult to record the meeting secretly.
Record with EaseUS RecExperts
An alternative third-party program to make your recording more flexible. The EaseUS RecExperts is a free video recording software that assists you to record almost all virtual meetings like Zoom, Microsoft, WebEx. It helps you to record the screen activities along with the audio on your Windows platform precisely.
The Remarkable Features of EaseUS RecExperts
- This app helps you to schedule your recordings as per your needs.
- There are options to edit the recorded clippings. You can add texts, titles according to your requirements.
- Customize the capturing area on the screen. Either you can opt for full screen or any selected coverage area.
- The simple user-friendly interface makes this app compatible with both beginners and professionals.
- It can also be regarded as a gif recorder
The Stepwise procedure to record the meetings on the Windows screen using the EaseUS RecExperts application.
Step 1: Download the program
Visit the official website of the EaseUS RecExperts and download the appropriate version of this program. Based on your system OS, download the program, and install it by following the instruction wizard. Launch this screen recording software soon after the successful installation.
Step 2: Choose the recording area
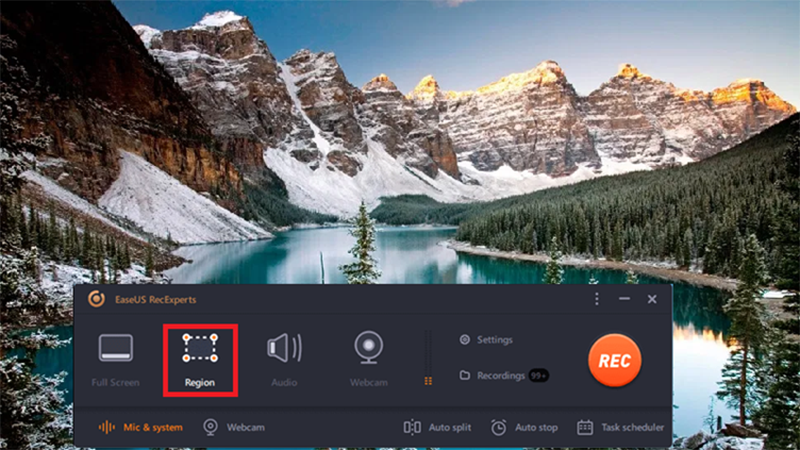
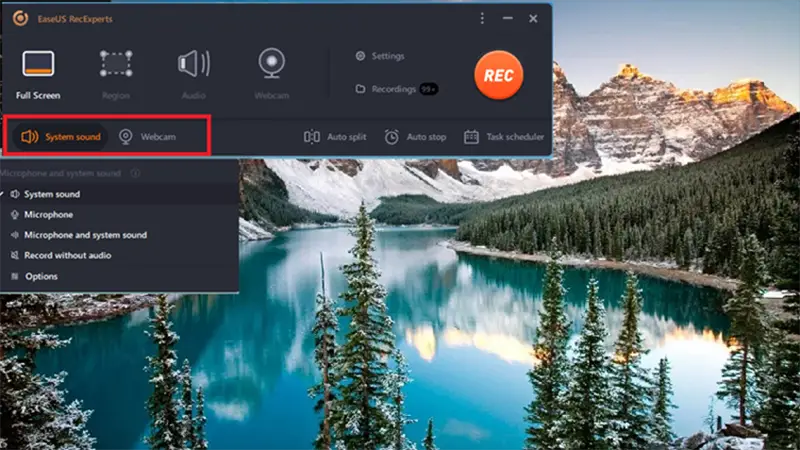
You can hit the first icon labelled as ‘Full Screen’ to select the entire Window screen for recording else click the next button ‘Region’ to customize the capture area. When you select the ‘Region’ option, you will find associated attributes focusing on the dimensions of the capturing space. You can assign the values according to your needs.
Step 3: Customize the Sound and Webcam parameters
You can work on the audio parameters by choosing the bottom left button ‘Sound System’. Personalize the audio values and save them accordingly. If you want to record all the activities relevant to the Webcam, then select the ‘Webcam’ icon next to the Sound System option.
Step 4: Start Recording
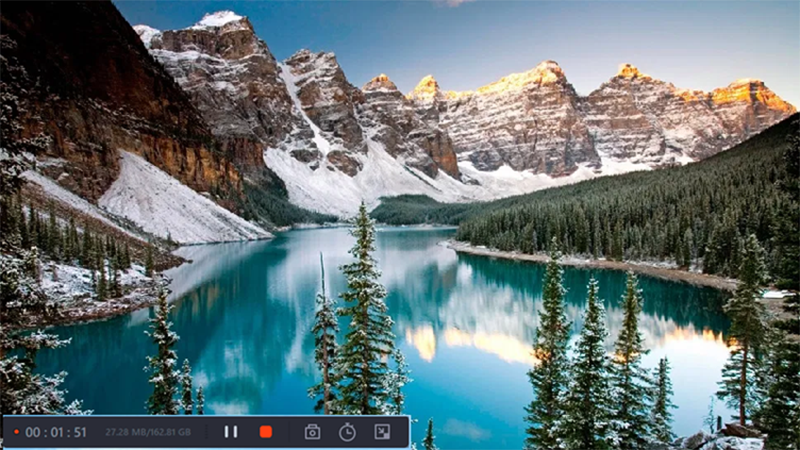
Now, press the ‘Rec’ button to trigger the recording process. A floating bar appears below the screen along with the Stop icon. You can tap that button if you want to quit your recording activity.
The recorded screen is now available in the system drive for the further editing process. When you play the recorded meetings, you can find the basic editing tools displayed to make further changes on the screen.
Conclusion
Thus, you had an enlightening discussion on how to use EaseUS RecExperts to record the system screen flawlessly. Choose this screen recorder without watermark to record the meetings for future reference. It provides a better space to carry out the precise format of recording. You can witness that every detail is recorded with utmost care retaining the quality factors without any issues. Choose the EaseUS RecExperts program and schedule your recordings effortlessly. Stay connected with this article to explore the impact of the recording tools in the digital space.
You may also like: Movavi Screen Recorder Review
